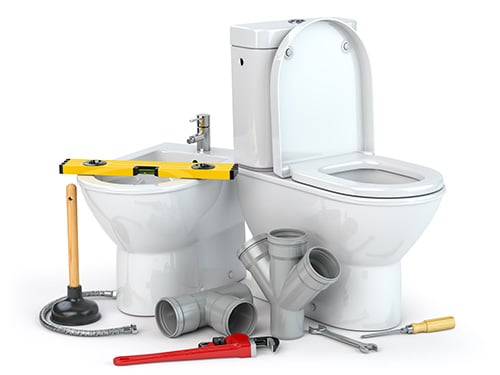
Replacing a toilet may seem like a daunting task, but with the right tools and a bit of know-how, it’s a manageable DIY project that can save you a significant amount of time and money. If you need professional help give us a call anytime! Whether you’re upgrading to a more efficient model or simply replacing an old, malfunctioning unit, this guide will walk you through the process step by step.
Tools and Materials You’ll Need
Before you begin, make sure you have the following tools and materials:
- Adjustable wrench
- Channel-lock pliers
- Putty knife
- Screwdriver
- Sponge
- Towels
- Bucket
- Wax ring
- Closet bolts (if not included with the new toilet)
- Toilet (bowl and tank)
- Toilet seat (if not included)
- Plumber’s tape
- Silicone caulk
Step 1: Preparation
Turn Off the Water Supply
Locate the shut-off valve behind the toilet and turn it clockwise to stop the flow of water. Flush the toilet to drain as much water as possible from the tank and bowl. Use a sponge or a towel to soak up any remaining water in the tank and bowl, and place a bucket underneath the shut-off valve to catch any drips.
Remove the Old Toilet
Disconnect the water supply line from the toilet tank using an adjustable wrench. Be prepared for some water to spill out. Next, remove the caps covering the closet bolts at the base of the toilet and use a wrench to unscrew the nuts. Gently rock the toilet back and forth to break the seal of the wax ring and lift the toilet off the floor. Place the toilet on an old towel or sheet to catch any remaining water.
Clean the Flange
With the old toilet removed, scrape off the old wax ring from the flange using a putty knife. Ensure the flange is clean and in good condition. If it is cracked or broken, it will need to be repaired or replaced before installing the new toilet.
Step 2: Installing the New Toilet
Install New Closet Bolts
Place new closet bolts into the flange, making sure they are evenly spaced and upright. Some flanges have slots for the bolts to slide into, while others may require a special bracket.
Position the Wax Ring
Turn the new toilet bowl upside down on a soft surface and press the new wax ring onto the outlet of the toilet. Make sure it is centered and firmly attached.
Place the Toilet
Carefully lift the toilet bowl and lower it onto the flange, aligning the holes in the base with the closet bolts. Gently press down to compress the wax ring and create a watertight seal. Once in position, rock the toilet slightly to help it settle into place.
Secure the Toilet
Place washers and nuts on the closet bolts and tighten them using a wrench. Be careful not to overtighten, as this can crack the porcelain. Once the toilet is secure, trim any excess bolt length with a hacksaw if necessary and snap on the bolt caps.
Step 3: Attaching the Tank
Install the Tank Hardware
If the tank and bowl are separate, start by installing the tank bolts and gasket. Place the rubber gasket over the hole at the bottom of the tank and insert the bolts through the designated holes.
Attach the Tank
Carefully lower the tank onto the bowl, aligning the bolts with the holes in the bowl. Tighten the nuts on the bolts from underneath, alternating between bolts to ensure even pressure. Again, avoid overtightening to prevent cracking.
Step 4: Connecting the Water Supply
Reattach the Water Supply Line
Connect the water supply line to the fill valve on the bottom of the tank. Use plumber’s tape on the threads to ensure a good seal, and tighten the connection with channel-lock pliers.
Turn On the Water
Slowly turn the shut-off valve counterclockwise to restore water to the toilet. As the tank fills, check for leaks around the base and the water supply connection. If you notice any leaks, tighten the connections slightly.
Test the Toilet
Once the tank is full, flush the toilet a few times to ensure everything is working correctly. Check again for any leaks around the base and connections.
Step 5: Finishing Touches
Install the Toilet Seat
If the new toilet does not come with a seat, attach one now according to the manufacturer’s instructions. Typically, this involves aligning the seat with the holes in the bowl and tightening the bolts.
Seal the Base
For a finished look and additional stability, apply a bead of silicone caulk around the base of the toilet where it meets the floor. This helps prevent any movement and keeps debris from accumulating under the toilet.
Tips for Success
- Double-check measurements: Ensure the new toilet will fit in the space by measuring the rough-in distance (the distance from the wall to the center of the closet bolts).
- Have a helper: Toilets can be heavy and awkward to maneuver. Having an extra pair of hands can make the process easier and prevent damage.
- Use a new wax ring: Always use a new wax ring to ensure a proper seal. Reusing an old wax ring can lead to leaks.
- Level the toilet: Before fully tightening the bolts, make sure the toilet is level. Use shims if necessary to achieve a stable and level fit.
By following these steps, you can replace your toilet with confidence. Not only will you have a functioning new fixture, but you’ll also have the satisfaction of completing a home improvement project on your own. Happy plumbing!
*Please note that Ron’s Speedy Plumbing will not be held responsible for any damages or issues that may arise from attempting DIY plumbing projects based on our advice or blog content. For complex or hazardous situations, we recommend consulting with a professional.*


